 |
DIY • Do it Yourself • Weekend Projects • BIG Projects • LITTLE Projects | |||||
|
DIY • Do it Yourself • Weekend Projects • BIG Projects • LITTLE Projects | |||||
How Do I Share My How-To?It's really pretty easy, pictures and videos of the steps it takes to complete your project are stored on YouTube and picasaWeb. Once your "final" video is stored on YouTube, your project will show in the listings on the site. All this is controlled by our Creator's Tools. Basically, you start a project by writing up the project idea. Step 1. Sign up for a free Creator's Account to gain access to the Creator's Tools. Step 2. Login Step 3. Push the "Create New Project" button on the Creator's Tools. Make a name (you can change it later) for your project. And describe your plans to use as notes to guide the creation of the steps. Step 4. When you've finished providing all the steps to your project, shooting the videos and saving to google video via the Creator's Tool Panel, you are ready to write the introductory paragraph with an interesting story of how you did it, or how you do it in the case of a professional services presentation. Step 5. Last but not least create and upload the video (to YouTube) which is the video that will be used to summarize the project. If you were building a robot, this final video would show the robot running around, doing fun things that will inspire others to create their version of your project. That's it... Watch the views and ratings for your project pile up along with the sales commissions! Or get a customer because you showed how you remodel a house. |
FAQ About Becoming A CreatorQ. Why would I go to all that work, building something, then put it on a website like C What I Can Do? What's the point? A. Actually, there are a couple of forms for a reward:
|
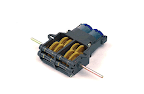
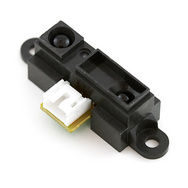
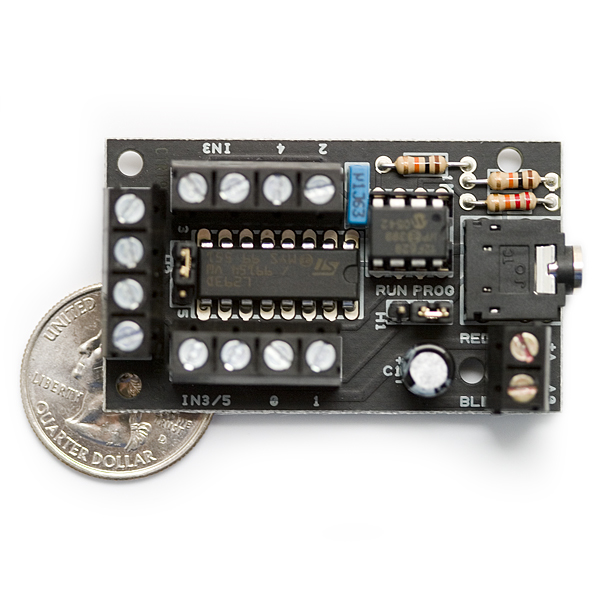
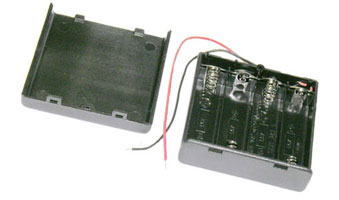
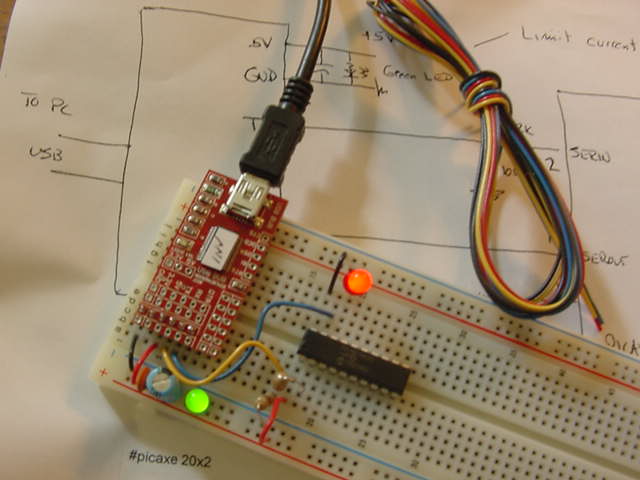
BeagleBone Black plus Web Browser Equals Homebuilt Robot Control ... 32048 Views Author's name: weRbots Subtitle here should be, "Part 2a, Roboteer`s Guide to BeagleBone Black." This is the introduction to the software and setups along with pins to allow you to actually hookup servo drive, etc. These are my experiences moving through a noob`s point of view. In the beginning, they told you, "Update to the latest version of BBB angstrom OS." I waited a long time to do this, but finally settling in on a project I finally upgraded to the new one, 20113.06.20 This was encouraging, I switched back to the production software and everything settled back to normal. I noted in the later models I had A5A, but there was already an A5B, and A5C, but there were no major modifications. Then I looked at A6, and there were wiring and component changes. I decided, "I`ll hold off till I slowly begin to understand". I uploaded Angstrom ver 20113.06.20, it worked, and then revealed the differences between what I read and what actually happens when I try to get it to go on its own. Right off I am crushed to find out that the OS I have operating (without HD, of course) cannot do some things I was previously thinking I could actually do. Trying to get a servo to work was easy, the joystick was easy, but two servos at the same time, going different places. I would combine the single package examples into one big working unit in its smallest pieces. That worked, you can see it in the second video. The first video shows operation of the individual sections. First lesson - forget that fancy map in my beagle bone project from last time. That`s not how this version works. It`s not set up that way. NEXT DISCOVERY My otherwise working (from the factory Angstrom) HDMI stopped. OK, I don`t need it for what I want to do - I want to replace a $5 robot controller. I want to swap out a $10 solution with a $50 solution and observe the differences. A TO D CONVERTERS A/D: Fiddling with analog inputs. Strategy: use joystick as my "volume control." Solution: OK all seven work, whew! I was thinking I would have to make an init program. But node.js made it easy. And having 1.8v source verifies for me that you can put a 10k pot from Analog plus to ground to get 0-1.8 volts the complete range of the analog to digital converters. HDMI. No noob ez fix. Strategy: Tried to no avail with this Angstrom. Solution: After upgrade: No HDMI. kinda sucks, but I`ll live with it. PWM. I needed three PWMs, two timed to drive servos and one for robot speed and direction control. Strategy: Experimenting with my old "map" of IOs that I proposed in the earlier article: "BEAGLEBONE BLACK for ROBOTICS." Solution: Still filled with hope for the potential, I mapped out non-dedicated ports to use to control a robot. Only one port was properly configured to a PWM controlled by the javascript out of the box. P9_42. The other two were setup for demos P8_13 and P9_14. Good to go. RELAX, I THINK I CAN DO IT Encouraging words: for the extra $30, I have eleven gpio pins on P9 availiable and 1 on P8! It`s leaning toward the 45 buck solution. 2.5 Amp 5vdc power supply is used here, so I can suck power to show the parts run. Overview This video shows using three demos that will allow me to check any/every thing I will need to replace the robot driver board using a picAxe. Just curious to see if the $5 dollar board can directly plug in to replace a $5 dollar 18M on a perfboard, less than 10 bucks in parts. Node.js is supplied and that pretty much permits you to use the browser and socket connections to the built-in linux system creating your own web pages on the fly, and executing programs to control your robot. Once you bring up your BBB as a controller, you can use a web browser on your own local network to program the bits and pieces you need to build your own robot. Take a look at the diagrams of the pins. The stars in the P8 and P9 diagrams means that pin has been selected and tested in this project. Note, I marked the VDD5v pin, pin P9_5, with the camel-humped testOnly. Don`t do this exercise without an external 5v source, it could upset the servos. The stars on the AnalogIn pins mean they all work, I designated them IR detector P9_39, but there are seven AINs, a reference and the AIN`s ground, which itself, likes to be grounded to your system`s ground. Nine pins give you a ref voltage, and the 7 Analog Inputs (AIN0-6). Ditto with the pins off the joystick, the "slider" part of your variable resistor provides X and Y information. Servo Control var b = require(`bonescript`); var SERVO = `P9_14`; var duty_min = 0.03; var position = 0; var increment = 0.1; b.pinMode(SERVO, b.OUTPUT); updateDuty(); function updateDuty() { // compute and adjust duty_cycle based on // desired position in range 0..1 var duty_cycle = (position*0.115) + duty_min; b.analogWrite(SERVO, duty_cycle, 60, scheduleNextUpdate); console.log("Duty Cycle: " + parseFloat(duty_cycle*100).toFixed(1) + " %"); } function scheduleNextUpdate() { // adjust position by increment and // reverse if it exceeds range of 0..1 position = position + increment; if(position < 0) { position = 0; increment = -increment; } else if(position > 1) { position = 1; increment = -increment; } // call updateDuty after 200ms setTimeout(updateDuty, 200); } Some Eyes: Using IR or Ultrasonic transducers IR Detector var b = require(`bonescript`); var analogVoltage = 0; /* Check the sensor values every 2 seconds*/ setInterval(read, 1000); function read(){ b.analogRead(`P9_40`, printStatus); } function printStatus(x) { var distanceInches; analogVoltage = x.value; // ADC Value // console.log(`v = ` + analogVoltage); distanceInches = analogVoltage * 2 ; console.log(parseFloat(distanceInches).toFixed(3)); } Motor Control Solarbotics L298 Compact Motor Driver. You can see from the solarbotics motor driver manual the PWM signal (yellow wire) equally feeds both motors. Typically, this works great. But you have a BBB on your hands. If you have motor differences (the thing steers right or left, you can solve it with another PWM pin. Since I am moving from a PicAxe 18M part (with limited pins) I am using the 5 pin setup, like the diagram. Later, I can split out another PWM pin from the BBB and independently control motor speed. That might be nice as I can now "steer" the thing by sending a different PWM signal to each pin. For now, this version of the OS will not split the two, but as I design this thing for BBB, I`ll see if I end up with that spare PWM signal so I can have full flexibility in steering. Motor Control Software: ------------------------------------------ /* Robotic Function Amalgamate REL 1.0 Mar 19 2014 J. Huffman REL 2.0 Apr 05 2014 J. Huffman integrating motor and servo IR integration completed Logic Table enMx low, Mx high = forward enMx high,Mx low = reverse enMx high,Mx high = stop braked enMx low, Mx low = stop --///---///--- | 1k 1k | 1/2 IR Det volt divider --- + 0 - 1.75 volts - for 1.8v ADC */ var b = require(`bonescript`); // IR OBJECT DETECTOR var IRanalogVoltage = 0; var anaIn = `P9_40`; // SERVO SECTION var SERVO1 = `P9_42`; var SERVO2 = `P9_14`; var duty_min = 0.03; var position = 0; var increment = 0.1; var oldDuty = 0.0; // MOTOR CONTROL SECTION var motorSpeed = `P8_13`; var enM1 = `P8_12`; var M1 = `P8_14`; var enM2 = `P8_16`; var M2 = `P8_18`; // SET Control Pins b.pinMode(motorSpeed, b.OUTPUT); b.pinMode(enM1, b.OUTPUT); b.pinMode(enM2, b.OUTPUT); b.pinMode( M1, b.OUTPUT); b.pinMode( M2, b.OUTPUT); b.pinMode(SERVO1, b.OUTPUT); b.pinMode(SERVO2, b.OUTPUT); /* Testing Timing */ setInterval(read, 100); fwd(); //setTimeout(rev, 2000); /* Motor Control */ //fwd function fwd(){ b.digitalWrite(enM1, b.LOW); b.digitalWrite(M1, b.HIGH); b.digitalWrite(enM2, b.LOW); b.digitalWrite(M2,b.HIGH); b.analogWrite(motorSpeed, 0.5, 60, dummy); setTimeout(rev, 2000); } function rev(){ b.digitalWrite(enM1, b.HIGH); b.digitalWrite( M1, b.LOW ); b.digitalWrite(enM2, b.HIGH); b.digitalWrite( M2, b.LOW ); b.analogWrite(motorSpeed, 0.7, 60, dummy); setTimeout(stop, 2000); } function stop(){ b.digitalWrite(enM1, b.HIGH); b.digitalWrite( M1, b.HIGH); b.digitalWrite(enM2, b.HIGH); b.digitalWrite( M2, b.HIGH); setTimeout(fwd, 2000); } /* Servo Commands */ updateDuty(); function updateDuty() { // compute and adjust duty_cycle based on // desired position in range 0..1 var duty_cycle = (position*0.115) + duty_min; // y Axis b.analogWrite(SERVO2, duty_cycle, 60, scheduleNextUpdate); /* console.log("Duty Cycle2: " + parseFloat(duty_cycle*100).toFixed(1) + " %"); */ // y Axis oldDuty = 0.05; // 0.035 lowest - 0.08 highest b.analogWrite(SERVO1, oldDuty, 60, dummy); /* console.log("Duty Cycle:3 " + parseFloat(0.7*50).toFixed(1) + " %"); */ } function dummy(){ } function scheduleNextUpdate() { // adjust position by increment and // reverse if it exceeds range of 0..1 position = position + increment; if(position < 0) { position = 0; increment = -increment; } else if(position > 1) { position = 1; increment = -increment; } // call updateDuty after 200ms setTimeout(updateDuty, 500); } /* IR Detection */ function read(){ b.analogRead(anaIn, printIRstatus); } function printIRstatus(x) { IRanalogVoltage = x.value; // ADC Value if ( IRanalogVoltage > 0.3 ) { console.log(IRanalogVoltage);} } Putting It Together Using P8 P9 maps together For 10 bucks from adafruit, you can get a blank "cape" I used the blank cape just to wire up this thing as a robot controller. This is not an official cape, as it would have a PROM with its information and address in it. I simply used the pins connections to allow me to run the robot around without having wires plugged in. Over riding software listing makes it run like in Video. This video shows the sytem integration "first test" now you see the two servos and and LED. The servos respond to the joystick. The LED is driven by the same PWM that will drive the motors. It didn`t show up too well in the first video, but it is very clear in the example. That`s because I changed the code to trigger on a certain level from the IR detector, so you can see it operate in the video. It turns on and off... In the code I made it "blink" by adding: if (IRanalogVoltage <= 0.3) b.analogWrite(motorDrivePWM , 0.5 , 200, dummy); else b.analogWrite(motorDrivePWM , 0.0 , 200, dummy); This replaced the (still operational) code from the first videos so you can actually see the change take place because it`s radically changing the brightness of the LED from on (0.7) and off (0.00) when you hit the limit. old code: b.analogWrite(motorDrivePWM , 0.0 , 200, dummy); System Software: // Here it is, everything moving around and doing as you want it to. Joystick - Why Not? OK, OK, getting the analog stuff going, I was lazy, so I used a joystick I had setting around because it was there. When testing the elements for moving servos and reading detectors with analog outputs, It was easy to plug some more jumpers in. Thus, I tested both x and y so I decided to make it part of the video, but don`t need it to make the robot. Lazy again, I put it in the video for this project, but left it out for creating this robot. So here is the code for the demo video: ------------------------------------------------------------ var b = require(`bonescript`); var IRanalogVoltage = 0; /* Check the sensor values every 2 seconds*/ setInterval(read, 1000); function read(){ b.analogRead(`P9_40`, printIRstatus); } function printIRstatus(x) { var distanceInches; IRanalogVoltage = x.value; // ADC Value // console.log(`v = ` + IRanalogVoltage); distanceInches = IRanalogVoltage * 2 ; console.log(parseFloat(distanceInches).toFixed(3)); } What`s Next? Accelerator 3 axis LED RGB - Running Lights Oh, I almost forgot about motor control. These are digital pins, but, I haven`t tested them under fire yet. Putting these pieces together to make an entirely capable robot which can do collision avoidance, wall following, etc... I am excited to hook this up to a robot, just to feel good about something. If there is a part 2 to this project, it will be that I wish to upgrade again to the actual "latest" and simply "allow" it to work it`s magic and/or pin assignment conflicts. (There was a rumor the HDMI might work for me on that. I was not able to get to it work before, but I`ve got a good many hours in the pilot`s seat by now. I want to give it another try. Goal to see how small and low-current processors can become, till they are something you can buy with future appliances all with a smart card. I hope they stick with Standard SD... The mini and micro are best to be in the controller itself. A linux system on SD, with the uSD that plugs into it! Now anyone can make a new appliance fitted to accept an SD card with which the appliance can report on it`s activities - To you personally, or the private network you invite ppl. Live in an apartment, crammed for washer/dryer space? Push in a card for one unit to do double-duty. You get the picture, you probably own a smart phone or two? user programmable appliances mixers, blenders, etc... As for me. My son has already gotten some elements of the open CV running. I`m going to get his instructions and start to play around with a camera to use for space mapping maybe object recognition (and avoidance). The Last Issue (?) To get it to run around a little, I developed some test software. It`s very simple, "If you see something back up, if it keeps coming at you, keep backing up." And this way we test the entire unit. Here was my deal though. The +5v from the unit was actually about 4.9 volts. On the low side for the electronics on the beaglebone black. I made up a battery pack (5.0v) separate from the main supply. Now I can actually put the thing out in the room and see what happens which is what`s in the video itself. Clearly we see the hand and even some cat feet in part of the video. The thing backs up to avoid the object. The tests are done. What now? Stay tuned. First, I`ll upgrade the system software again and this time I`ll maybe get to put the HDMI display 720p, that worked with the shipping software. Now that we have mastered the javascript for this thing, let`s see what else will be available in the last software release, then test everything and ask the robot to do something a little more impressive next time. Goal to see how small and low-current processors can become, till they are something you can buy with future appliances all with a smart card. I hope they stick with Standard SD... The mini and micro are best to be in the controller itself. A linux system on SD, with the uSD that plugs into it! Now anyone can make a new appliance fitted to accept an SD card with which the appliance can report on it`s activities - To you personally, or the private network you invite ppl. Live in an apartment, crammed for washer/dryer space? Push in a card for one unit to do double-duty. You get the picture, you probably own a smart phone or two? user programmable appliances mixers, blenders, etc... Final Code Simple Object Avoidance: ------------------------------------------- /* Robotic Function BBB Organizer REL 1.0 Mar 19 2014 J. Huffman REL 2.0 Apr 05 2014 J. Huffman integrating motor and servo IR integration completed REL 3.0 Apr 08 2014 JRH Basic Run 01 Logic Table: enMx low, Mx high = forward enMx high,Mx low = reverse enMx high,Mx high = stop braked enMx low, Mx low = stop --///---///--- | 1k 1k | 1/2 IR Det volt divider --- + 0 - 1.75 volts - for 1.8v ADC */ var b = require(`bonescript`); // IR OBJECT DETECTOR var anaIn = `P9_40`; var IRanalogVoltage = 0.0; var triggerLevel = 0.4; // SERVO SECTION var SERVO1 = `P9_42`; var SERVO2 = `P9_14`; var duty_min = 0.03; var position = 0; var increment = 0.1; var oldDuty = 0.04; // 0.035 lowest - 0.08 highest // MOTOR CONTROL var motorSpeed = `P8_13`; var enM1 = `P8_12`; var M1 = `P8_14`; var enM2 = `P8_16`; var M2 = `P8_18`; // SET Control Pins b.pinMode(motorSpeed, b.OUTPUT); b.pinMode(enM1, b.OUTPUT); b.pinMode( M1, b.OUTPUT); b.pinMode(enM2, b.OUTPUT); b.pinMode( M2, b.OUTPUT); b.pinMode(SERVO1, b.OUTPUT); b.pinMode(SERVO2, b.OUTPUT); /* Overview Basic Robot Control Functions */ //centerServo(); //updateDuty(); //while(1===1){ setInterval(read, 200); // fwd(); // read(); //} /* Motor Control */ //fwd function fwd(){ b.digitalWrite(enM1, b.HIGH); b.digitalWrite(M1, b.LOW); b.digitalWrite(enM2, b.HIGH); b.digitalWrite(M2,b.LOW); b.analogWrite(motorSpeed, 0.5, 60, dummy); // setTimeout(rev, 2000); } //rev function rev(){ stop(); b.digitalWrite(enM1, b.LOW); b.digitalWrite( M1, b.HIGH ); // b.digitalWrite(enM2, b.LOW); // b.digitalWrite( M2, b.HIGH ); b.analogWrite(motorSpeed, 0.4, 60, dummy); //setTimeout(stop, 2000); } //stop function stop(){ b.digitalWrite(enM1, b.HIGH); b.digitalWrite( M1, b.HIGH); b.digitalWrite(enM2, b.HIGH); b.digitalWrite( M2, b.HIGH); //setTimeout(fwd, 2000); } /* Servo Commands */ // updateDuty(); function centerServo(){ b.analogWrite(SERVO2, oldDuty + 0.04, 60, dummy); b.analogWrite(SERVO1, oldDuty, 60, dummy); } function updateDuty() { // compute and adjust duty_cycle based on // desired position in range 0..1 var duty_cycle = (position*0.115) + duty_min; // x Axis b.analogWrite(SERVO2, duty_cycle, 60, scheduleNextUpdate); /* console.log("Duty Cycle2: " + parseFloat(duty_cycle*100).toFixed(1) + " %"); */ // y Axis //oldDuty = 0.05; // 0.035 lowest - 0.08 highest b.analogWrite(SERVO1, oldDuty, 60, dummy); /* console.log("Duty Cycle:3 " + parseFloat(0.7*50).toFixed(1) + " %"); */ } function dummy(){ } function scheduleNextUpdate() { // adjust position by increment and // reverse if it exceeds range of 0..1 position = position + increment; if(position < 0) { position = 0; increment = -increment; } else if(position > 1) { position = 1; increment = -increment; } // call updateDuty after 200ms setTimeout(updateDuty, 200); } /* IR Detection */ function read(){ b.analogRead(anaIn, IRstatus); } function IRstatus(x) { IRanalogVoltage = x.value * 10; // ADC Value if ( IRanalogVoltage > triggerLevel ) { console.log(IRanalogVoltage); rev(); } else fwd(); } Epilog: Summary It was pretty simple though it required a lot of patience to get enough commands I could supply in javascript working. And I already did the update to 2013.09.04.img, and without changing anything but the Angstrom version, none of the functions worked. I didn`t do any troubleshooting. It was enough to know I had pretty much hit the limits with my older A5A version. Things I could still do to this "bot": Add RGB Led, this is the best debugging tool ever. It can be used to tune multiple sensors. I have enough pins. Monitor Motor power, there are a lot of spare analog inputs, I`d use one to monitor power and increase/decrease PWM`s on-time so as the batteries begin to lose power, I can compensate. I could hook up x,y,z axis accelerometer that could shut down the motor if the "bot" get`s stuck. And I could add a backup sensor so the thing could avoid backing up into things. Most of the other refinement would be to the software, and yes, I am thinking about opencv to allow some simple camera navigation. This would allow the robot to "follow me" by wearing a tag on my sleeve. This I would import to the pickup truck bot. I`m not stuck with a little model running around the kitchen floor. I want to move the robo-navigation system to the big bertha bot. Though I am thinking of springing for the extra bucks and get my hands on the A6A, with a prayer that I can hookup my monitor again!?? It's Easy To: C - What - I - Can - Do • Sign up - Get ID and Password• Plan and Create a Project That Someone Might Enjoy and May Even Want to Build• Link to your creation on your favorite social networking site or blog.• Become famous! Because your projects get a lot of Hits!
|
By Creators DoctorZoidberg: Converting a Flashlight to LED DoctorZoidberg: Home Project: MUTE TV Wearable TV Muter! DoctorZoidberg: Scare Crow - For Modern Gardens - Home Project jim: CwhatIcanDo Website jim: Tour This Website PaulSandin: Butler, a low-cost mobile robot base WeRbots: BEAM BOT: HexBug Exposed! WeRbots: Buggy Bot: Wire Frame Bot Body WeRbots: Easy Cheap Robot Weekend Project WeRbots: RFL Robot Out Of The Box Experience WeRbots: Robot Man: With Robot Demos WeRbots: Build Your Own Track Drive Robot WeRbots: Build a Robot In 5 Minutes WeRbots: i-Mon App WeRbots: How To Make A Virtual Robot in FLASH WeRbots: Droid From Motorola :: A Robot ? WeRbots: Robots Almost Anyone Can Afford WeRbots: How To Build a Robot in a Box WeRbots: picAxe 18m2 for robotics WeRbots: Build a Respectable Autonomous Robot WeRbots: On Line Neighborhood Watch WeRbots: Pong))))) WeRbots: Roboteer`s Guide to BeagleBone Black WeRbots: Autonomous Robot PVC "Pickup Truck" |
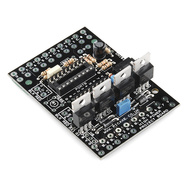
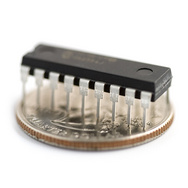
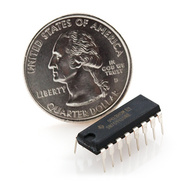
By Keywords Action Script 2: How To Make A Virtual Robot in FLASH Ajax: CwhatIcanDo Website Ajax: CwhatIcanDo Specs: RC2 Ajax: battle Android: Droid From Motorola :: A Robot ? Android: battle batting cage installation: Home Installation of a 4 Section In-Ground Batting Cage BEAM Robots: BEAM BOT: HexBug Exposed! BEAM Robots: picaxe 8m: Wall Follower Mouse gets Majorly Modded BEAM Robots: How to build simple analog balancing robots BEAM Robots: battle Block Watch Cam: On Line Neighborhood Watch Cheap Robot: Easy Cheap Robot Weekend Project Cheap Robot: How To Build a Robot in a Box Cheap Robot: Autonomous Robot Built From Power Chair Wheelchair commercial killer: Home Project: MUTE TV Wearable TV Muter! Convert Your Flashlight to LED: Converting a Flashlight to LED Create a Project: HELP :: How To Create a Project CwhatIcanDo HELP: HELP :: How To Create a Project Do it Yourself: Robots Almost Anyone Can Afford Do it Yourself: Scare Crow - For Modern Gardens - Home Project Do it Yourself: Wheelchair Works 3 Ways: Manual, R/C, and Autonomous Do it Yourself: On Line Neighborhood Watch Droid Smart Phone: Droid From Motorola :: A Robot ? Easy to Make Robot: Easy Cheap Robot Weekend Project entertainment: Home Project: MUTE TV Wearable TV Muter! FLASH Applications: How To Make A Virtual Robot in FLASH HELP: Tour This Website How To: CwhatIcanDo Website How To Build Cheap Bots: Robots Almost Anyone Can Afford How To Build Cheap Bots: How To Build a Robot in a Box How To Website: Tour This Website How To Website: CwhatIcanDo Website Infrared Proximity Sensor: Build Your Own Track Drive Robot IR Detector: Build Your Own Track Drive Robot Lighting Projects: Converting a Flashlight to LED logic analyzer: An affordable Logic Analyzer for the workbench. multi: Multi Media Messaging Device Mute the TV: Home Project: MUTE TV Wearable TV Muter! open source: An affordable Logic Analyzer for the workbench. picAxe: Build Your Own Track Drive Robot picAxe: picAxe 18m2 for robotics picAxe 08m: Robots Almost Anyone Can Afford picAxe 14m: picAxe 14m Motor Driver Board: Make Your Own picAxe 14m: How To Build a Robot in a Box picAxe 18m2: picAxe 18m2 for robotics picAxe 18m2: Weekend Project: Get Started With Robots picAxe 18m2: Build a Robot From A Power Wheelchair picAxe 18m2: Autonomous Robot Built From Power Chair Wheelchair picAxe 18m2: Wheelchair Works 3 Ways: Manual, R/C, and Autonomous picAxe 18x: How To Build a Robot in a Box picAxe 18x: picAxe 18m2 for robotics picAxe 18x: Build a Robot From A Power Wheelchair power wheelchair: Wheelchair Works 3 Ways: Manual, R/C, and Autonomous Quick Build Robot: Build a Robot In 5 Minutes RFL Robots: Building an RFL Inspired Upright Robot Base RFL Robots: RFL Robot Out Of The Box Experience robot bending: Morphibian Land Shark robot bending: Build a Robot From A Power Wheelchair Robot Man: Robot Man: With Robot Demos Robot Motor Control: Build the L298 H-Bridge Motor Control Robot Motor Control: Robot Basics Robot Motor Control: picAxe 14m Motor Driver Board: Make Your Own Robot Motor Control: Buggy Bot: Wire Frame Bot Body Robot Motor Control: picAxe 8 bit Motor Controller: Look Inside Robot Motor Control: How to build simple analog balancing robots Robot Motor Control: Build a Robot From A Power Wheelchair Robot Motor Control: Autonomous Robot Built From Power Chair Wheelchair Robot Pets: DogBot the Robo Dog : Robotic WatchDog Robot Pets: Operation of the Tri-Bot From Wowwee! Robot Pets: Robot Man: With Robot Demos robotics: Droid From Motorola :: A Robot ? robotics: Easy Cheap Robot Weekend Project Robots: BEAM BOT: HexBug Exposed! Robots: Robot Basics Robots: Buggy Bot: Wire Frame Bot Body Robots: Build a Robot In 5 Minutes Robots: Build Your Own Track Drive Robot Robots: Easy Cheap Robot Weekend Project Robots: How To Build a Robot in a Box Rumble Bot Conversions: Robots Almost Anyone Can Afford Security System: On Line Neighborhood Watch Select or type in a Keyword: Converting a Flashlight to LED track drive robot: Build Your Own Track Drive Robot Virtual Pet Robot: How To Make A Virtual Robot in FLASH web: CwhatIcanDo Website web 2.0 site: CwhatIcanDo Website web 2.0 site: CwhatIcanDo Specs: RC2 Weekend Project Robots: Easy Cheap Robot Weekend Project Weekend Project Robots: Weekend Project: Get Started With Robots |
Click To Expand / Contract Menus. View by Creator, Category, Keywords or Number of Views.